
For the last month I have been giving serious consideration to cutting my hair. Maybe it's just me wanting a drastic change for the new year, or perhaps I, like so many others have been tempted by the slew of celebrities that have been sporting shorter and edgier do's in the past couple of months, whatever the reason, shorter hair is really appealing at the moment.
I've mentioned the desire to go shorter a few times to my hairstylist Pearson Knight, but he's been pretty hesitant, which is understandable especially considering that I have been known to ask for a drastic change without considering my lifestyle and hair texture, then regret my decision a week later. (Can you relate?!) Instead of giving into my pleas to just chop it all off, Pearson suggested that I try wearing my hair in a faux bob, similar to the shorter length I was considering. He told me to try this for a few days to a week to see if I really liked the way I look with shorter hair or if I just wanted to be a part of the latest hair trend.

So I did as he requested and tried a faux bob, which was accomplished by pulling my hair into a loose, low ponytail at my nape and securing with a binder, I then left the ends of my ponytail in the binder. I then slid the binder down my nape to gain a bit of space so that I would be able to roll the ponytail under and secure with pins to the base of my scalp. When securing my hair with the pins, Pearson suggested that I criss-cross the pins so that it would be more stable and have staying power. I then pulled the desired amount of hair over my hair and towards my jawline to create the desired length and fullness and lo and behold I had myself a faux bob!
At first I loved how much lighter my hair felt. It was also weird how naked my neck felt and my features stood out a lot more with shorter hair. After trying the faux bob a few times, my faux shorter hair lost its novelty and I kept thinking about how much I loved my top knots, side braids and ponytails. Needless to say I decided against going with shorter hair and instead went with shorter layers, which I LOVE. If you are considering going shorter I highly suggest trying a faux short hairstyle before taking the plunge!
 Subscribe to A Girl’s Gotta Spa!
 for more beauty reviews! Watch our reviews on
YouTube. Got a Kindle?
We’re on Kindle too!

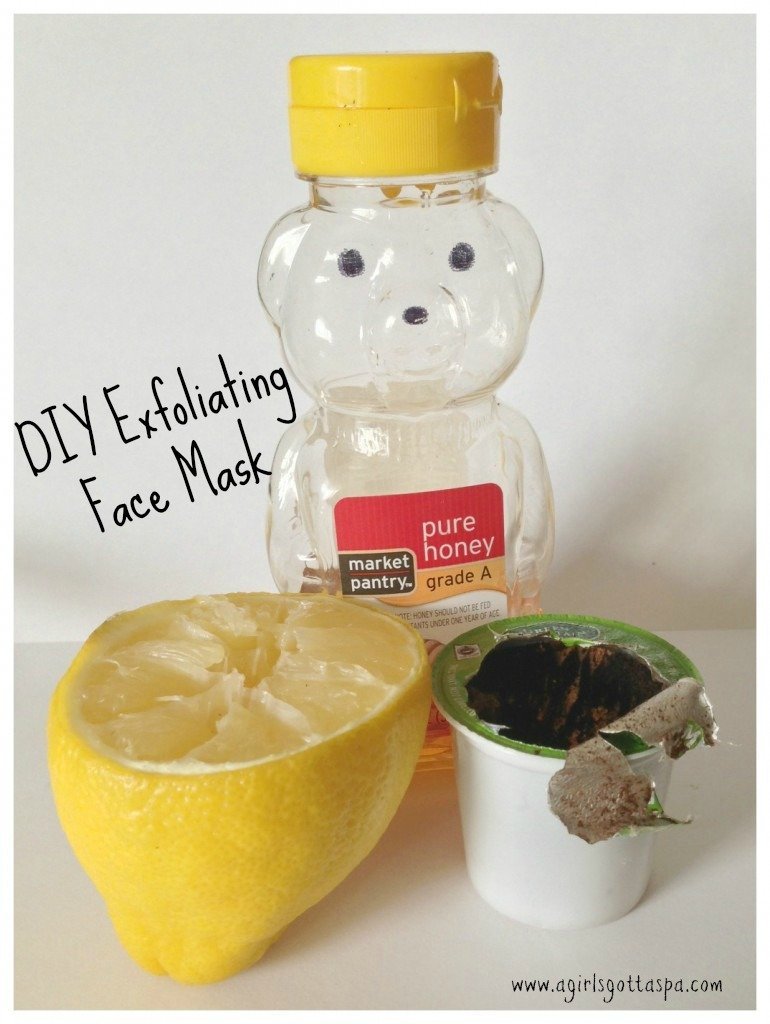
 My favorite beauty treatments are those that I can create myself with ingredients from my own kitchen. Creating my own beauty treatments makes me feel good about what I am putting on my skin because I know exactly where the ingredients came from and I know that they won't harm my skin.

 Have you tried making a DIY mask at home? I'd love to hear your recipe!
Subscribe to A Girl’s Gotta Spa! for more beauty reviews! Watch our reviews on YouTube. Got a Kindle? We’re on Kindle too!
*Disclosure
Have you tried making a DIY mask at home? I'd love to hear your recipe!
Subscribe to A Girl’s Gotta Spa! for more beauty reviews! Watch our reviews on YouTube. Got a Kindle? We’re on Kindle too!
*Disclosure


