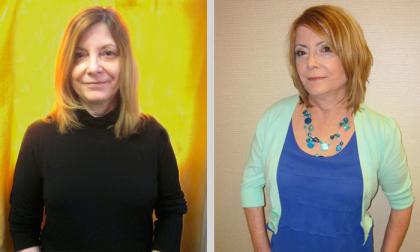
If you are local here in Northeast PA, then you may be aware that our very own Amanda, a DJ on 98.5KRZ, is a melanoma survivor. Amanda is a vibrant personality who is the picture of health. However, at the young age of 25, Amanda noticed something unusual about her skin that led her to obtain a shocking diagnosis: Melanoma cancer.
Since May is Melanoma Awareness Month, I recently interviewed Amanda to find out how she discovered the abnormality and what she is doing now to protect herself from skin cancer.

Q: How old were you when you first noticed that something wasn't right about your skin?
I was 24 when I first noticed what I called a “mark” on my breast. I didn’t call it a mole at first because it was just a dot and it had just recently appeared. (Or at least I had just noticed it was there.) It was something I noticed one day when I got out of the shower and ignored for a few months until I saw that it had changed.
Q: Can you describe what Melanoma looked like?
When I first noticed the “mark” in question, it was a small dark dot. Almost like the tip of a black Sharpie marker. A few months later, it was a larger dark dot that now had a brownish rim around it. The dark center had a faded brown rim with uneven edges that almost looked smeared.
At this point, it was the size of a pencil eraser. I showed a friend and continued to show her every couple of weeks so that she could tell me whether or not she thought it was changing. I didn’t want to overreact about it, but at the same time I kept reminding myself that I didn’t remember ever seeing it there before.
I kept saying that and that gut feeling is what ended up saving my life. I knew that “dot” was turning into a growing, darker mole, was not there before.
Q: Prior to this point, would you say you had a good handle on understanding what Melanoma was?
NOT AT ALL. Actually, I didn’t even really know what Melanoma was or how serious is it. I knew enough about skin cancer to know that it was a red flag to have a mole that is changing, which is the only reason I ended up addressing the mole with my doctor.
Q: Leading up to this, had you been wearing sunscreen on a regular basis?
No, but I also wasn’t a sun worshiper. Sunscreen was one of those things I would apply if I remembered to, but it wasn’t a priority. I always felt some level of heat exhaustion when I was out in the sun, so I never stayed out in it long in the first place. But before Melanoma, hats were a fashion accessory, not a sun safety must.
Q: Had you ever used a tanning bed or had multiple sunburns?
I have to admit, as much as I wish I never had, I did use tanning beds, but not regularly. If I had to guess, I’d say I probably used a tanning bed between 20-30 times in my life. Just a few times before special occasions to "get a base."
It sounds so stupid now, but I either didn’t know better or didn’t care. Had I known the fear I would feel just a few years later, I would have never directly put myself in that kind of danger. As far as sunburns go, I grew up in New England and spent some time at the beach growing up, so I’m sure I had a few sunburns, but I can’t recall anything significant. (It only takes 6 sunburns in your lifetime to put you at risk for skin cancer.)
Q: How long did you wait until you asked a medical professional about it?
I waited far too long to show a doctor. Silly me, time was ticking. It was about 6 or 7 months from when I first noticed the “dot” until the “dot” grew into a dark weird shaped mole. Still then, I watched it.
It continued to grow and look funnier for a few months. I continued to show a friend who is very active with the American Cancer Society and her reaction is what made me finally realize I needed to say something.
I didn’t actually see a doctor about it until almost a year after I first noticed that something was up. For anyone reading this who is questioning a mole - PLEASE DO NOT WAIT! Waiting was extremely stupid, but I wasn’t educated enough to know I was allowing the cancer time to spread.

Q: Once you saw a doctor, what happened next?
I first showed my gynecologist because the mole I was watching was on my breast and because I wasn’t sure it was something to worry about, I waited until my yearly check up. It was very dumb to wait for it to be convenient to get it checked out, but my appointment was coming up and I just figured that would be a good time to show the doctor.
When I showed her what I was worried about, she got serious. She told me I needed to call a dermatologist the moment I left her office and tell them that my doctor said I needed to be seen immediately. I wasn’t expecting the urgency; probably because I didn’t have the slightest clue how fast Melanoma spreads or how serious it is. (While my gynecologist doesn’t know skin as well as a dermatologist, since my experience, she has made an extra effort to check her patients for suspicious looking moles in private areas that primary doctors don’t typically see.)
I called the dermatologist (I was a new patient, I didn’t have any reason to see a derm before) and scheduled an appointment. Next thing I knew, I was having 3 moles removed for biopsy. The one on my breast was the only one I knew about and was worried about. Little did I know, there were 2 more pre-cancerous moles living on me. One was on my back, the second on my other breast. The suspicious mole on my right breast actually was Melanoma.
When my dermatologist first called, I was on the air and told him I couldn’t talk. We were in the middle of our show and to be honest, I wasn’t expecting him to say anything bad. He said he’d stay a little late that night to call me back and give me the news when I got off the air.
When he called again an hour later, he told me that a team of experts reviewed my case and diagnosed me with Melanoma. He then said I would be requiring another surgery immediately. My eyes filled with tears, but to be completely honest, I wasn’t really sure what Melanoma even was.
He told me that my oncologist would be calling in the morning to schedule the surgery because they feared that the cancer may have already begun to spread to my lymph nodes. Wait, I need an oncologist? Isn’t that a cancer doctor? So for anyone who are under the impression that it’s “just skin cancer, they can just scrape it off,” that is very far from reality and that has become a statement that will throw me right into sun safety preach-mode.
He told me not to go home and Google or look it up on Web MD because the information is very scary. Of course, that’s exactly what I did. To say that I was scared out of my mind doesn’t even begin to describe what I was feeling. I felt dumb. Why did I wait so long to see the doctor? Did I do this to myself?
The surgery was painful. I am sharing these details with hopes that it will reach someone and change the way they think about their time spent in the sun. I don’t wish this experience on anyone, but I am grateful to have caught it in time to warn others.
In order to find which lymph nodes the cancer would likely spread to, I was brought down to the radioactive medicine department and had a radioactive tracer dye injected direction into my areola. (The mole site was nearby.)
I was told this lymph scan with dye is the same scan that breast cancer patients also receive before surgery. To say that the dye stung is a gross understatement. I laid there on a cold metal table surrounded by doctors, weeping. It burned. The injection site and my whole chest burned like it was on fire.
They injected this dye 5 separate times. Wearing a thin paper robe, naked from the stomach up, sobbing on a cold metal table. I laid there for an hour while the machine showed the doctors where to operate and which lymph nodes to remove. I’ve read that this is often done while under general anesthesia, but for me it was not and it was extremely painful. The gist – this is not fun.
Later that day, they put me under and they removed a bunch of lymph nodes (sentinel lymph node biopsy) from under my right arm. In addition to the lymphadenectomy, my surgical oncologist also did a wide local excision of the mole site and the surrounding area. They cut and scooped a 4 inch area on my breast to get all of the infected cancer cells out.
The doctors said it looked like the cancer had just begun to spread to my lymph system, but we literally caught it “just in time” before it got any further. Of course, we didn’t get this news until 1.5 weeks AFTER the surgery.
Telling this story back now loses some intensity because it lacks the time spent worrying in between appointments. The waiting was the worst part. There are weeks in between biopsies that you have absolutely no idea what you’re facing. All you can do is wonder. Is it that bad? Am I catching it in time? Will I have a chance to fight it?
While recovering at home and waiting for the results from this surgery, I daydreamed about my future with my then boyfriend, now husband. I wondered if we’d even have a chance to live the life we dreamed of together (update: we are now married with two beautiful girls.)
My mom was also wonderfully supportive through all of this (especially the waiting) and often reminded me not to worry until there was something to worry about. I was blessed with a chance to tell you what I went through because thankfully, we caught it just in time.
What I learned from this that I hope you take with you, is to know your body. I essentially caught this myself. Melanoma is the fastest spreading skin cancer and the deadliest. It spreads so fast that waiting to get something checked out can cost you your life.
Q: How has Melanoma changed the way you spend your time outdoors and sun safety in general?
Melanoma has changed everything about the way I spend time outdoors. I don’t just hang out outdoors. I go out and live a normal social life, but I take extra steps to make sure I’m prepared to protect myself. I use sunscreen like a regular moisturizer. ALL THE TIME. I’m obsessed with protecting my skin from the sun and I now feel like it’s my duty to educate others about sun safety.
I don’t go to the beach and hang out. I don’t spend long periods of time out in the sun and I don’t drive around during peak hours with my sun roof open. Work wise, I work in radio and we often do live broadcasts outdoors at concerts. Before Melanoma, you would likely find me bopping around all over the place, now you’ll find me under the tent.
My first vacation after Melanoma was terrifying. I was scared to be outside, but realized I also can’t stop living. I went armed with sunscreen, hats and cover-ups. I no longer look at hats as just fashion accessories, but as MUSTS that also happen to be cute. Melanoma is not going to stop me from looking cute, but I am going to embrace being pale.
I try every new sunscreen that hits shelves and have found some favorites that also give a nice glow and even shimmer. The main thing is that now I’m using it! I also wear sunglasses every day. While they are also cute fashion accessories, Melanoma can also form on your eyes and they need to be protected too. I keep a pair of sunglasses on me at all times.
My experience with Melanoma has left me with an overall sense of paranoia about my own skin that I like to just call awareness. I constantly check myself for new “marks” (I still call them that) and even take pictures of moles that I think may be changing. Sometimes I start to convince myself something doesn’t look right because it’s a fear, but that fear stems from learning how serious Melanoma is.
Since my surgery, I have had a few scares and other procedures done. For a 6 month span, I had MRI’s done on my brain because there was fear that the Melanoma had spread there. I also had another mole removed from a very private place that NEVER sees sun. I literally mean NEVER. I also found this myself. Again, I caught this in time before it spread.
This was another frightening reminder that this is going to be a never ending battle with the sun and with my own paranoia and fear of not catching it in time, next time. My current struggle is with trying to find a balance between awareness and living in a constant state of fear.
Q: What key piece of advice do you want readers to know about Melanoma?
The one thing I hope readers take away is that Melanoma is not a beast you want to fight and a worry you want to have. KNOW YOUR BODY. Do a monthly skin check and know what moles already exist and what they look like. Taking pictures helps.
If you start to worry something is changing, measure it. One thing I try to stress to my friends and family is that you have to be your own finder; your doctor doesn’t see you enough to notice small moles that may change. Know your body, know when it’s changing, and speak up when something doesn’t look right! You could save your own life.
Melanoma is the second most common cancer in women between the ages of 20 and 35, and the leading cause of cancer death in women ages 25 to 30.
Early signs of melanoma are changes to the shape or color of existing moles or the appearance of a new mole. They are often referred to as the ABCDE’s of Melanoma.
If it looks suspcious - schedule an appointment right away with your dr!
 No summer beauty routine is complete without the incorporation of a great sunscreen. Which for me means one with at least an SPF of 30, one that isn't greasy feeling and oily looking and one that does not leave my skin looking chalky. And I've found my perfect sunscreen for summer just in time for a Memorial Day weekend teeming with outdoor activities.
MD Solar Sciences Mineral Creme SPF 50 Broad Spectrum UVA-UVB Sunscreen is the perfect combination of natural, lightweight, matte with an SPF of 50 and is pretty much invisible on skin with the exception of a really pretty glow. The Mineral Creme rubs in quickly and easily and best of all I can't even feel it on my skin...even after reapplying it my skin never felt greasy or clogged.
This is absolutely the best sunscreen for my face. In the summer my skin is more prone to breakouts than at any other time of the year and MD Solar Sciences Mineral Creme SPF is specifically formulated for acne prone skin. Besides feeling and looking amazing on my skin, this sunscreen also contains antioxidants, naturally derived Zinc Oxide and Titanium Dioxide and does not contain parabens, allergens, gluten, fragrance or irritants. Aesthetically, I just love the packaging of this sunscreen with its pink tube with the lime green cap; it just screams summer. For me this sunscreen had absolutely no cons and I am elated that I found the perfect sunscreen to use all year round! (Shannon also did a review of their Mineral Lotion SPF 50.)
Subscribe to A Girl’s Gotta Spa! for more beauty reviews! Watch our reviews on YouTube, see our pins on Pinterest. Got a Kindle? We’re on Kindle too!
*Disclosure
No summer beauty routine is complete without the incorporation of a great sunscreen. Which for me means one with at least an SPF of 30, one that isn't greasy feeling and oily looking and one that does not leave my skin looking chalky. And I've found my perfect sunscreen for summer just in time for a Memorial Day weekend teeming with outdoor activities.
MD Solar Sciences Mineral Creme SPF 50 Broad Spectrum UVA-UVB Sunscreen is the perfect combination of natural, lightweight, matte with an SPF of 50 and is pretty much invisible on skin with the exception of a really pretty glow. The Mineral Creme rubs in quickly and easily and best of all I can't even feel it on my skin...even after reapplying it my skin never felt greasy or clogged.
This is absolutely the best sunscreen for my face. In the summer my skin is more prone to breakouts than at any other time of the year and MD Solar Sciences Mineral Creme SPF is specifically formulated for acne prone skin. Besides feeling and looking amazing on my skin, this sunscreen also contains antioxidants, naturally derived Zinc Oxide and Titanium Dioxide and does not contain parabens, allergens, gluten, fragrance or irritants. Aesthetically, I just love the packaging of this sunscreen with its pink tube with the lime green cap; it just screams summer. For me this sunscreen had absolutely no cons and I am elated that I found the perfect sunscreen to use all year round! (Shannon also did a review of their Mineral Lotion SPF 50.)
Subscribe to A Girl’s Gotta Spa! for more beauty reviews! Watch our reviews on YouTube, see our pins on Pinterest. Got a Kindle? We’re on Kindle too!
*Disclosure